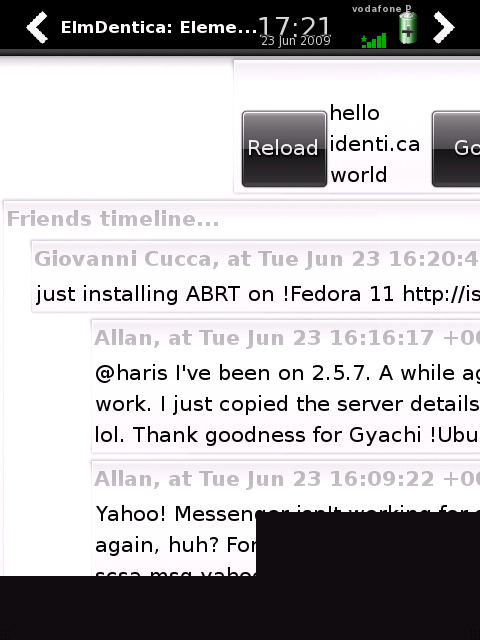
New elmdentica dev screenshot

Hi, I’m slowly starting to get a better hold on Elementary, once I fix the obvious problem in the screenshot below, I hope to release 0.1.0 tomorrow:

elmdentica now has a nice scrolling friends timeline...

Elmdentica 0.0.2 Screenshot

Hi, by popular request, here’s a screenshot of elmdentica in action. Yes, it’s not pretty, I know… as I learn Elementary (or people make patches) it’ll get improved… 🙂

0.0.2 in action...
0.0.2 in action...

elmdentica release 0.0.2

Ok, a new quick release of elmdentica. Biggest changes are some steps towards a better timeline display, and support for identi.ca errors (as wrong user or password data, for instance).

Get it here while it’s hot (and unusable) 🙂

elmdentica release 0.0.1

As some of you may know, I’m writing an identi.ca client with Elementary for the OpenMoko. This, is it’s first release. It’s almost totally unusable, right now, in great part due to a documentation that could be better (I’m looking at you, Elementary…), but you can already get a gist of what is can do.

Anyway, in the interest of release early, release often, here’s a first working release, 0.0.1:

I won’t hope you enjoy because it’s really crappy, now, but it loads in a jiffy 🙂

In defense of FSF’s Swindle campaign

Some don’t like that FSF is criticizing Amazon for defrauding users of their freedoms with Kindle.

FSF is calling it Swindle, so some guy say it’s whine-like name calling, for instance as in “Andy-Mandy”.

This reveals that this guy, at best, doesn’t know his English. It’s a totally appropriate* accurate wordplay, just check the definition of Swindle:

  • victimize: deprive of by deceit; “He swindled me out of my inheritance”; “She defrauded the customers who trusted her”; “the cashier gypped me when he gave me too little change”
  • the act of swindling by some fraudulent scheme; “that book is a fraud”

See?

Well, at least I hope Andy Lester’s criticism is not because he may have something to gain from Amazon

* so I’m not a native English speaker…

XBMC for Fedora 11

Ok, not yet RPMS but these instructions should work flawlessly as is on Fedora 11.

Firstly, you should add the rpmfusion repositories to your machine, then install a few packages so your build will work:

sudo yum -y install \
        SDL* glew glew-devel libmad-devel tre tre-devel \
        libogg libogg-devel libvorbis libvorbis-devel \
        boost boost-devel bzip2-devel bzip2-libs fribidi* \
        lzo lzo-devel mysql-libs mysql-devel jasper jasper-devel \
        faac faac-devel enca enca-devel hal hal-devel hal-libs \
        cmake gperf nasm libXmu-devel fontconfig-devel \
        freetype-devel libXinerama-devel pcre-devel gcc-c++ \
        sqlite-devel curl-devel libsamplerate-devel libcdio-devel \
        pulseaudio-libs-devel avahi-devel ffmpeg-devel libmad-devel \
        a52dec-devel libdca faad2-devel libmpeg2-devel libass-devel \
        libvorbis-devel libogg-devel libmpcdec-devel flac-devel \
        wavpack-devel python-devel subversion

This will allow for a lot of the dependencies to be made external, which is a good thing!

Now, to fetch the repository of XBMC (well, let’s use the latest, but theses instructions should work with a stable release source package):

mkdir ~/svn ; cd ~/svn
svn co http://xbmc.svn.sourceforge.net/svnroot/xbmc/branches/linuxport/ xbmc

It will take a short while to fetch everything, depending on your connection, you may even be better off having a coffee or some tea.

Now you should go into the  ~/svn/xbmc/XBMC/ directory and run configure. My run installs xbmc on /opt/xbmc and enables some external dependencies. Unfortunately, even with the required dependencies some of the options need changes not yet available in the official packages, so we’ll be using some internal versions instead. Don’t worry about it, we’ll just specify the ones which will be external.

Unfortunately, mysql-libs doesn’t supply a “generic” path for the shared object file, so we’ll also need to “hack” its existence before running xbmc’s configure:

sudo ln -s /usr/lib/mysql/libmysqlclient.so.16.0.0 /usr/lib/libmysqlclient.so

./configure --prefix=/opt/xbmc \
  --enable-external-libmad \
  --enable-external-liba52 \
  --enable-external-libmpeg2 \
  --enable-external-libass \
  --enable-external-libvorbis \
  --enable-external-libogg \
  --enable-external-libmpcdec \
  --enable-external-libflac \
  --enable-external-libwavpack \
  --enable-external-python \

This will result in the following output, at the end:

------------------------
  XBMC Configuration:
------------------------
  Debugging:    Yes
  Profiling:    No
  Optimization: Yes
  OpenGL:       Yes
  VDPAU:        No
  Joystick:     Yes
  XRandR:       Yes
  PCRE Support: Yes
  MID Support:  No
  ccache:       No
  PulseAudio:   Yes
  FAAC:         Yes
  DVDCSS:       Yes
  Avahi:        Yes
  External Libraries:   No
  External FFmpeg:      No
  External libmad:      Yes
  External liba52:      Yes
  External libdts:      No
  External libfaad:     No
  External libmpeg2:    Yes
  External libass:      Yes
  External libvorbis:   Yes
  External libogg:      Yes
  External libmpcdec:   Yes
  External libflac:     Yes
  External libwavpack:  Yes
  External Python:      Yes
  prefix:       /opt/xbmc
------------------------

Unfortunately, make failed due to some problem with accessing libjpeg internals. The official package doesn’t contain all you need, so you have to use hack XBMC’s code in order to force using the internal version of libjpeg:

make
In file included from tif_ojpeg.c:35:
/usr/include/jpeglib.h:1096:55: error: jpegint.h: No such file or directory
tif_ojpeg.c: In function ‘OJPEGPreDecode’:
tif_ojpeg.c:1414: error: dereferencing pointer to incomplete type
tif_ojpeg.c:1424: error: dereferencing pointer to incomplete type
tif_ojpeg.c:1425: error: dereferencing pointer to incomplete type
tif_ojpeg.c:1426: error: dereferencing pointer to incomplete type
tif_ojpeg.c:1428: error: ‘DSTATE_INHEADER’ undeclared (first use in this function)
tif_ojpeg.c:1428: error: (Each undeclared identifier is reported only once
tif_ojpeg.c:1428: error: for each function it appears in.)
tif_ojpeg.c:1508: error: dereferencing pointer to incomplete type

Even though it looks awful, just fix tif_ojpeg with this patch file and run make again.

After this, you run make install to install into /opt/xbmc, and if you want to have an X session that launches XBMC automatically, then you can also add

sudo ln -s /opt/xbmc/share/xsessions/XBMC.desktop /usr/share/xsessions/

Now you can create a guest account and launch the computer automatically into that user, running XBMC.
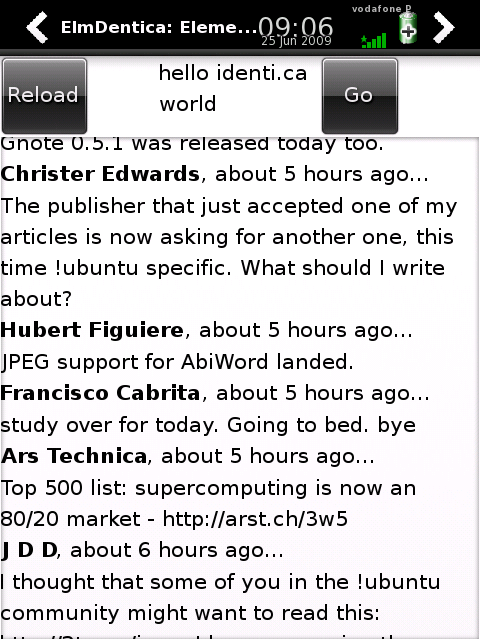
Import VCF contacts into Paroli

Om2009’s telephony application is Paroli, and it uses it’s own contacts database. Ingvaldur Sigurjonsson made a script to import VCF contacts but it wouldn’t work on most of my contacts, which were imported via Bluetooth about two years ago.

Since some had CRLF and others had LF as line terminators (ok, some VCF contacts were hand-made, as it’s a very nice contacts backup format which you can grep, etc…), I hacked the script to handle both cases, but mostly, to handle the case when the phone_info list had only one element, which the script wouldn’t take in account resuling in about 150 contacts lost from 270.

It also doesn’t take in account PREFerred phone numbers, so I removed then with the following command:

sed -i -e 's,;PREF,,' *.vcf

As it is likely helpful to others, here it is under a title which will surely be picked up by search engines for this issue: vcf2paroli

Do you enjoy the results?

Successfully imported 270 contacts!

There two things I didn’t like:

  1. it imported multiple times the same contact if it has more than one phone number
  2. clicking on the die produced the expected result but with a bug: some buttons are hidden (so I registered bug #180)
Oops! They don't fit at all! #180

Libertando uma Fonera

A minha velhinha Fonera 2100A já mais que merecia ser libertada, mas só recentemente a libertei das amarras proprietárias da Fon. Procurei pelas instruções no wiki do OpenWRT para a modelo 2100A, mas o “oldwiki” do OpenWRT peca precisamente naquele problema que os Wikis por vezes têm a tendência em falhar: comentários pelo meio do texto importante, algumas experiências documentadas de forma confusa, etc.

Daí que após algumas procuras mais, encontrei um excelente site com uma explicação passo a passo, embora ainda assim necessitasse de alguns ajustes. Segue então o que eu fiz diferente, de acordo com a numeração da explicação:

1: Recuperar o acesso ao sistema.

  • senha do root: estava com um problema… mudei recentemente a password e esqueci-me. Felizmente podia recuperar o firmware original pressionando no ‘reset’ durante cerca de 30s.
  • controlo do sistema: a forma de recuperar a senha do root também recuperava o sistema original, a release 0.7.1 r1, cujo interface web é vulnerável à injecção de comandos, permitindo iniciar o servidor de ssh. As instruções aqui são para 0.7.2 r3, mas envolvem o downgrade para a 0.7.1 r1, bastando começar a partir desse passo em vez de desde o início.

2: remover o DRM substituíndo o bootloader

No meu caso o 3º passo não funcionou, onde então foi necessário saltar o 4º passo, fazer o 5º e o 6º, por fim voltando ao 2º e 3º.

3: instalar o OpenWRT
Para mim os tamanhos especificados para as partições não batiam certo, ficando com espaço a menos. Receando fazer uma asneira que tornasse a Fonera num “tijolo”, procurei por mais gente com o mesmo problema e encontrei umas boas sugestões de tamanhos, que me permitiram completar a instalação com sucesso:

RedBoot> fis init
About to initialize [format] FLASH image system – continue (y/n)? y
*** Initialize FLASH Image System
… Erase from 0xa87e0000-0xa87f0000: .
… Program from 0x80ff0000-0x81000000 at 0xa87e0000: .
RedBoot> load -r -v -b %{FREEMEMLO} openwrt-atheros-root.squashfs
Using default protocol (TFTP)

Raw file loaded 0x80040800-0x801e07ff, assumed entry at 0x80040800
RedBoot> fis create -f 0xA8030000 -l 0x006F0000 rootfs
… Erase from 0xa8030000-0xa8720000: …………………………………………………………………………………………………
… Program from 0x80040800-0x801e0800 at 0xa8030000: ……………………..
… Erase from 0xa87e0000-0xa87f0000: .
… Program from 0x80ff0000-0x81000000 at 0xa87e0000: .
RedBoot> load -r -v -b %{FREEMEMLO} openwrt-atheros-vmlinux.lzma
Using default protocol (TFTP)

Raw file loaded 0x80040800-0x801007ff, assumed entry at 0x80040800
RedBoot> fis create -r 0x80041000 -e 0x80041000 vmlinux.bin.l7
… Erase from 0xa8720000-0xa87e0000: …………
… Program from 0x80040800-0x80100800 at 0xa8720000: …………
… Erase from 0xa87e0000-0xa87f0000: .
… Program from 0x80ff0000-0x81000000 at 0xa87e0000: .
RedBoot> fis load -l vmlinux.bin.l7
Image loaded from 0x80041000-0x80282085
RedBoot> exec

Lançado o exec, que ainda demorou cerca de 20 minutos, tinha uma Fonera com OpenWRT pronta para o que necessitasse.

Neste momento tenho-a preparada para 2 cenários:

  1. partilha do meu acesso à Internet (melhor que a rede Fonera por ser aberta), mas não a tempo inteiro 🙂
  2. partilha de um link de rede para algum evento.